
Fixing a Dripping Tap: Understanding Cartridge, Ball, and Ceramic Disc Types

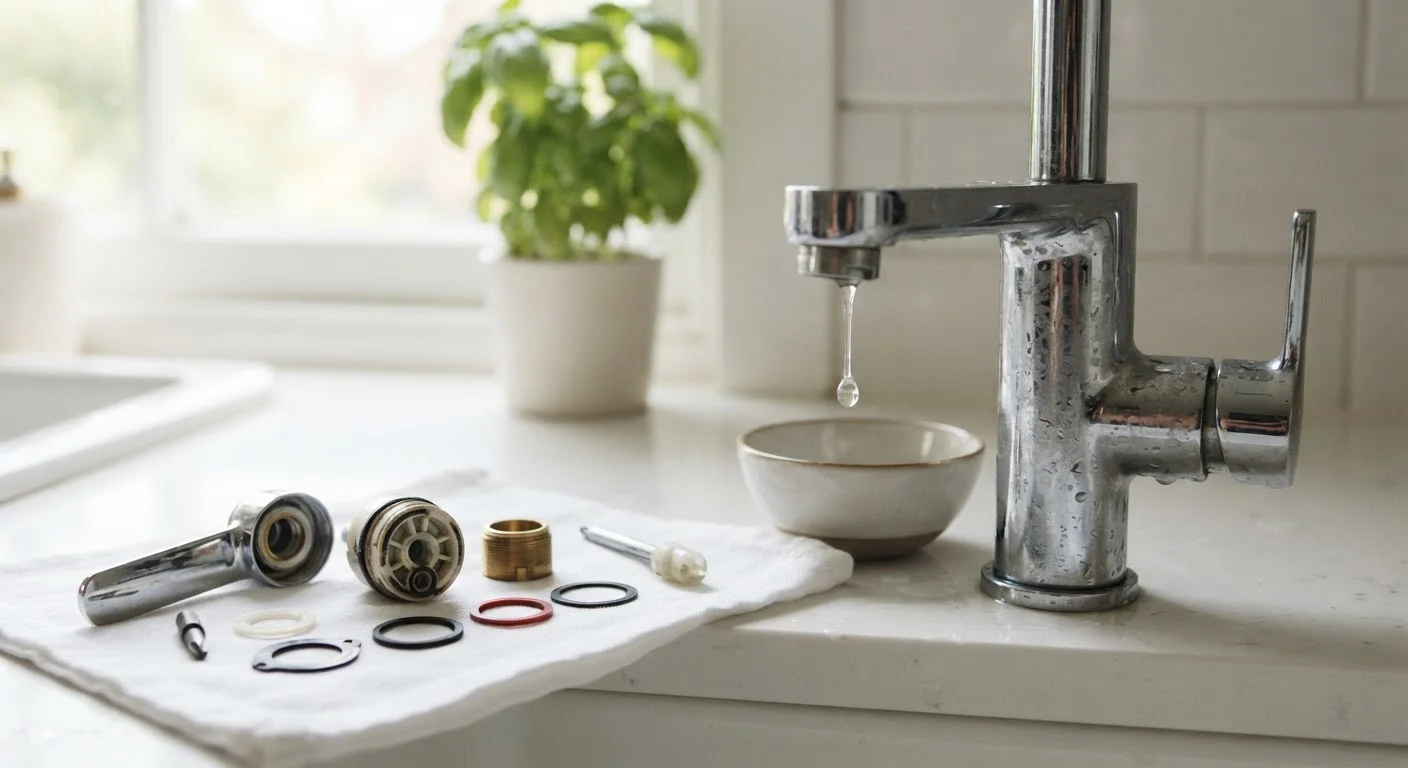
Photo: InsightsVault.com | Interesting Daily Reads editorial
Key Takeaways
- Three main tap types - cartridge, ball, and ceramic disc - each require a different repair approach.
- Identifying your tap mechanism before buying parts saves time and avoids wasted spending.
- Shutting off the water supply fully before disassembly is non-negotiable for safe repair.
- A dripping tap can waste roughly 3,000 gallons of water annually, making prompt repair financially worthwhile.
- Most cartridge and ceramic disc repairs cost under $15 in parts when completed as a DIY job.
Why Tap Type Matters Before You Touch a Wrench
A dripping tap is one of the most wasteful problems a household can let slide. A single tap dripping once per second can waste roughly 3,000 gallons of water per year - and the repair often costs less than $15 in parts. The most common DIY mistake is buying the wrong replacement component, which almost always happens because the homeowner didn't identify the tap mechanism first.
There are three mechanisms found in most US residential taps:
- Cartridge taps - single or double-handle designs that use a replaceable plastic or brass cartridge to control flow. Very common in bathroom vanities and kitchen sinks made after the 1980s.
- Ball taps - single-handle designs where a rotating ball-shaped cap controls both temperature and flow simultaneously. Recognizable by the lever that swivels in all directions; common in kitchens.
- Ceramic disc taps - single-lever designs with a wide cylindrical body. Two ceramic discs rotate against each other to control water. These are the most durable type; a drip here often signals a cracked disc or mineral buildup rather than a worn washer.
Older homes may have compression taps - the original two-handle design repaired by replacing a rubber washer on a threaded stem. That repair is even simpler but isn't covered in depth here since compression taps are increasingly rare in post-1970s construction.
Water waste compounds quickly across multiple fixtures. If you're tackling plumbing issues room by room, our guide to stopping a running toilet addresses a similarly common and costly problem.
Adjustable wrench
Loosens and tightens packing nuts and retaining rings without damaging fittings.
Phillips and flat-head screwdrivers
Removes handle screws and pries off decorative caps to access internal components.
Needle-nose pliers
Grips small O-rings, retaining clips, and cartridge components during removal.
Replacement cartridge or ceramic disc cylinder
The core repair part for cartridge and ceramic disc tap types - must match your tap model exactly.
Ball tap repair kit (seats, springs, O-rings)
Replaces the worn sealing components inside a ball-type tap mechanism.
Plumber's grease
Lubricates new O-rings and cartridge edges before reassembly to extend their service life.
Bucket or old towel
Catches residual water left in the tap body after the supply is shut off.
Cartridge puller
Removes stubborn cartridges that are stuck in the tap body without damaging surrounding components.
Before You Start
Confirm you have the right prerequisites and all tools within reach before shutting off the water. Leaving a tap disassembled while making a hardware store run is both inconvenient and risks losing small parts.
What you will need
For part identification, look for a brand name or model number stamped on the tap body near the base or beneath a decorative cap. If the marking isn't visible, take the disassembled cartridge or ball assembly to the hardware store for a physical match - store staff can usually identify common models on sight.
Step-by-Step Repair
Steps 1 through 3 apply to all tap types. Steps 4, 5, and 6 are mechanism-specific - read each heading and follow only the one that matches your tap.
Shut Off the Water Supply
Locate the shut-off valves beneath the sink - one for hot, one for cold. Turn each clockwise until fully closed. If no under-sink valves are present, shut off the main supply to the house. Open the tap handle to release pressure and drain residual water into a bucket or onto a towel placed below the drain.
Remove the Handle
Pry off the decorative cap on top of the handle using a flat-head screwdriver - it's usually snapped on, not threaded. Beneath it is a screw, typically Phillips head. Remove the screw and lift or pull the handle straight off. If mineral deposits have bonded it in place, rock it gently side to side rather than forcing it upward.
Identify the Internal Mechanism
With the handle removed, look inside the tap body to identify your mechanism:
- Cartridge tap: A plastic or brass cylinder held in place by a small retaining clip or nut. It pulls straight out once the clip is removed.
- Ball tap: A rounded metal or plastic cap is visible beneath the handle collar. Under the cap sit the cam, packing, and ball.
- Ceramic disc tap: A wide, squat cylindrical unit secured by two or three screws. The cylinder contains two ceramic discs stacked face-to-face inside.
If you're still unsure, photograph the interior and search the tap brand name together with the image for a manufacturer match.
Cartridge Tap: Remove and Replace the Cartridge
Using needle-nose pliers, remove the retaining clip - typically a small U-shaped metal piece seated at the top of the cartridge. Grip the top of the cartridge firmly and pull it straight upward. A cartridge puller tool is useful if it resists. Before inserting the new cartridge, apply a thin layer of plumber's grease to its O-rings. Align the ears or tabs on the new cartridge to match the original orientation, seat it fully, and replace the retaining clip.
Ball Tap: Replace Seats, Springs, and O-rings
Unscrew the cap and collar with an adjustable wrench. Lift out the cam, packing, and ball, keeping them in sequence. Use needle-nose pliers to remove the two inlet seats and springs from the valve body openings at the bottom. Install new springs and seats from your repair kit. Roll the old O-rings off the valve body and roll the greased replacements on. Reassemble in reverse order: ball first, then cam and packing, collar, and cap.
Ceramic Disc Tap: Clean or Replace the Disc Cylinder
Remove the screws holding the disc cylinder and lift it straight out. Inspect both ceramic discs for cracks - even a hairline fracture means the cylinder must be replaced. If the discs look intact, mineral buildup on the disc surfaces is the likely cause. Soak the cylinder in white vinegar for 30 minutes, rinse, and clean gently with a soft cloth. Do not use abrasive pads, which scratch the ceramic sealing surface. If replacing, install the new cylinder of the matching model and apply a thin film of plumber's grease to the disc edges before insertion.
Photograph Before You Disassemble
Testing and Preventing Future Drips
Once reassembled, turn the shut-off valve back on slowly. Open the tap to release trapped air - a brief sputter is normal - then close it fully. Watch the spout for 60 seconds. A few initial drips from residual water in the body are expected; persistent dripping after a minute means the new part isn't fully seated. Check orientation before overtightening anything, especially with ceramic disc cylinders, which crack under excessive torque.
Confirm Water Flow Has Stopped Before Opening the Tap Body
Match Your Replacement Part Exactly
To extend the life of your repair, avoid forcing tap handles closed. Cartridge and ceramic disc taps seal with light hand pressure - cranking them tight accelerates wear on the new components. In hard-water areas, an annual wipe-down of disc surfaces and a light re-greasing of O-rings during routine cleaning can prevent the mineral buildup that triggers most ceramic disc drips.
If the drip continues after a correct part replacement, the internal seat (the surface the washer or disc presses against) may be pitted or corroded - a condition that requires a seat wrench and dressing tool to fix, but remains within DIY reach with additional research. When any step involves pressurized supply lines you're not confident working with, consulting a licensed plumber is the straightforward call.
The content provided on our blog site traverses numerous categories, offering readers valuable and practical information. Readers can use the editorial team’s research and data to gain more insights into their topics of interest. However, they are requested not to treat the articles as conclusive. The website team cannot be held responsible for differences in data or inaccuracies found across other platforms. Please also note that the site might also miss out on various schemes and offers available that the readers may find more beneficial than the ones we cover.