
Stopping a Running Toilet: The Mechanics Behind the Fix

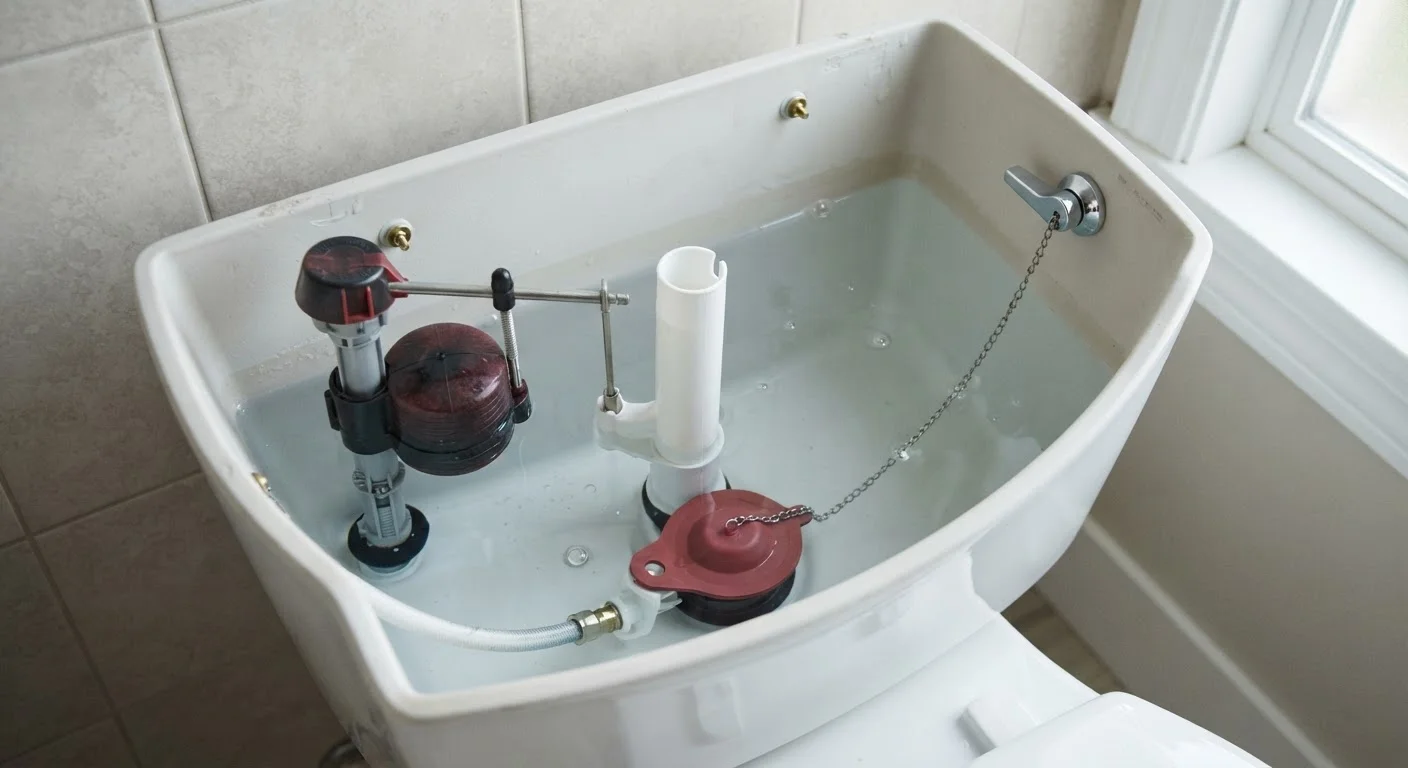
Photo: InsightsVault.com | Interesting Daily Reads editorial
Key Takeaways
- A running toilet typically wastes 200 gallons or more of water per day, meaningfully raising water bills.
- Most running toilet problems come from a faulty flapper, a misadjusted float, or a worn fill valve.
- Replacement parts for a toilet tank typically cost under $20 at any hardware store.
- No special tools or plumbing license are needed for standard tank-component repairs.
- Diagnosing the correct component before buying parts avoids wasted trips and unnecessary spending.
Why a Running Toilet Costs Real Money
A toilet that runs continuously - that faint hissing or trickling sound that never fully stops - isn't just annoying. Depending on the severity of the leak, it can waste anywhere from 20 to over 200 gallons of water per day. At typical US water rates, that adds up to tens of dollars per month on your utility bill, entirely avoidable with a repair that usually costs under $20 in parts.
The fix itself is well within DIY range for most homeowners. Unlike the faucet repairs covered in our guide to dripping tap mechanisms, toilet tank repairs don't require you to identify a specific valve cartridge type - the components are largely standardized and visible the moment you remove the tank lid.
Before reaching for a wrench, it helps to understand what's actually happening inside the tank. Three components are responsible for the vast majority of running toilet problems: the flapper, the float, and the fill valve. Pinpointing which one is misbehaving takes about two minutes and will tell you exactly what to buy.
What you will need
How the Tank Works: A 60-Second Primer
When you flush, the flapper - a rubber seal at the bottom of the tank - lifts to release water into the bowl. Once the tank empties, the flapper drops back down and creates a seal. The fill valve then opens to refill the tank. As the water level rises, a float (either a ball on an arm or a cylindrical cup around the fill valve) rises with it. When the float reaches the preset water level, it signals the fill valve to shut off.
A running toilet almost always means one of three things: water is leaking past the flapper into the bowl, the float is set too high and water is spilling into the overflow tube, or the fill valve itself is worn and won't fully close. Each has a distinct symptom and a straightforward fix.
The Dye Test Is Your Best Diagnostic
Diagnosing the Problem Before You Buy Parts
Remove the tank lid and set it safely aside. Then do two quick checks:
- Food coloring test for the flapper: Add a few drops of food coloring to the tank water. Wait 10 minutes without flushing. If color appears in the bowl, the flapper isn't sealing and water is leaking through.
- Overflow tube check: Watch the water level. If water is trickling into the tall central tube (the overflow tube), the float is set too high and the tank is overfilling. The water line should sit about one inch below the top of the overflow tube.
If neither test points to the issue but you can hear the fill valve cycling on and off periodically, the fill valve itself is likely faulty and needs replacement.
Shut off the water supply
Locate the shutoff valve on the wall behind or below the toilet. Turn it clockwise until it stops. Flush the toilet once to drain most of the water from the tank. Use a sponge or towel to remove any remaining water so you can work cleanly.
Inspect and replace the flapper
Unhook the flapper's ears from the pegs on the overflow tube and disconnect the chain from the flush handle arm. Examine the flapper closely - look for warping, mineral deposits, or visible cracking on the rubber sealing surface. Even if the damage isn't obvious, a flapper that is more than five years old is worth replacing given how inexpensive they are.
Fit the new flapper onto the overflow tube pegs and reconnect the chain, leaving about half an inch of slack. Too much slack and the flapper won't lift fully during a flush; too little and it won't seat properly afterward.
Adjust or replace the float
If the water level is too high and spilling into the overflow tube, adjust the float down. On a ball-and-arm float, bend the arm gently downward or turn the adjustment screw at the valve. On a cup-style float (the cylindrical type around the fill valve), pinch the clip and slide it down the shaft. The target water level is approximately one inch below the top of the overflow tube.
Restore water supply briefly to check the new level, then shut it off again before proceeding.
Replace a faulty fill valve
If the fill valve cycles on and off or hisses continuously even with the float correctly set and a new flapper installed, the valve itself needs replacing. Turn off the supply, flush, and sponge out the tank. Disconnect the supply line from the bottom of the tank, then use adjustable pliers to unscrew the locknut holding the fill valve in place. Lift the old valve out.
Insert the new fill valve, hand-tighten the locknut (plus a quarter turn with pliers - do not overtighten), reconnect the supply line, and attach the refill tube to the overflow tube. Restore water and adjust the float to the correct level per the manufacturer's instructions.
Test and confirm the repair
Restore full water supply and allow the tank to fill completely. Observe that the fill valve shuts off cleanly when the water reaches about one inch below the overflow tube. Flush once and watch the full cycle: flapper lifts, water drains, flapper reseats, tank refills, fill valve stops. Repeat the food coloring test after 10 minutes to confirm no water is seeping past the flapper into the bowl.
When to Call a Plumber
The repairs in this guide cover the vast majority of running toilet scenarios. However, if you notice cracks in the porcelain tank, water pooling at the base of the toilet, or the fill valve threads are corroded beyond removal, those situations warrant a licensed plumber. Attempting cracked porcelain repairs or main supply line work without the right experience can cause water damage that far exceeds the original repair cost.
Keeping internal toilet components in good shape is one part of a broader effort to reduce wasted water at home. For outdoor savings, the principles are similar - targeted maintenance beats reactive spending. Our water-wise gardening guide shows how the same logic applies to irrigation habits that quietly inflate utility bills.
This article is for general informational and educational purposes. Plumbing work that involves supply line shutoffs, structural components, or anything beyond standard tank-component replacement should be assessed by a licensed plumber. Always verify local code requirements before undertaking home repairs.
The content provided on our blog site traverses numerous categories, offering readers valuable and practical information. Readers can use the editorial team’s research and data to gain more insights into their topics of interest. However, they are requested not to treat the articles as conclusive. The website team cannot be held responsible for differences in data or inaccuracies found across other platforms. Please also note that the site might also miss out on various schemes and offers available that the readers may find more beneficial than the ones we cover.