
Air Sealing vs. Insulation: Which Energy Upgrade Delivers More Impact?

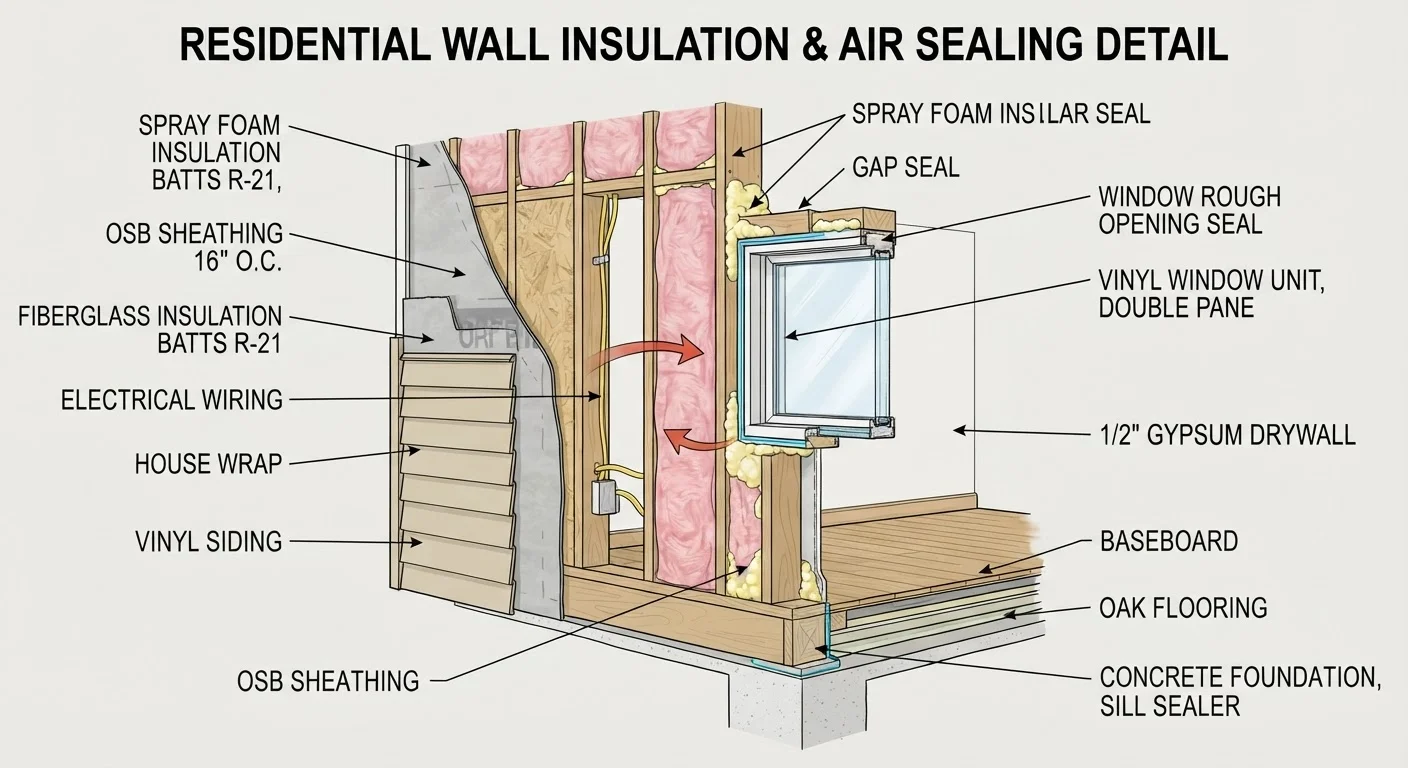
Photo: InsightsVault.com | Interesting Daily Reads editorial
Key Takeaways
- Air sealing stops conditioned air from escaping through gaps; insulation slows heat transfer through building materials.
- The U.S. Department of Energy estimates air leaks account for 25-40% of heating and cooling energy loss in typical homes.
- Air sealing generally costs less and delivers faster returns than full insulation upgrades.
- Both upgrades work best together - sealing first, then insulating, is the recommended sequence.
- DIY air sealing with caulk and weatherstripping is accessible for most homeowners; attic air sealing may require a professional.
- A home energy audit can identify where each upgrade will have the greatest impact before you spend a dollar.
What Each Upgrade Actually Does
Air sealing and insulation are often lumped together in energy efficiency conversations, but they address different physics problems.
Air sealing targets infiltration - the uncontrolled movement of air into and out of your home through cracks, gaps, and penetrations. Every gap around a pipe, electrical outlet, or poorly fitted door frame is a channel for conditioned air to escape and outdoor air to enter. No amount of insulation fixes this problem, because insulation slows heat transfer through solid materials, not airflow through gaps.
Insulation works by resisting heat conduction, convection, and radiation through walls, ceilings, and floors. It doesn't stop air movement directly - it reduces the rate at which heat migrates from one side of a building assembly to the other. The effectiveness of insulation is measured by R-value; the higher the R-value, the greater the thermal resistance.
Understanding the difference matters practically: insulating over unsealed gaps is a common and costly mistake. Air will still bypass the insulation, carrying heat or cold with it, and you'll see underwhelming results. The correct sequence - seal, then insulate - maximizes what you spend on both.
For a broader picture of how these upgrades fit into a year-round strategy, see the Home Energy Savings: A Complete Year-Round Roadmap.
Cost, Effort, and Where Each Upgrade Pays Off
| Criterion | Air Sealing | Insulation |
|---|---|---|
| Primary function | Stops uncontrolled airflow through gaps | Resists heat transfer through materials |
| Typical DIY scope | High - caulk, foam, weatherstripping | Low to moderate - attic batts possible; blown-in usually pro |
| Entry-level cost | $20-$100 for basic materials | $500-$2,500+ depending on area and type |
| Permit typically required | Rarely | Sometimes, especially crawl spaces |
| Best location to start | Attic top plates, outlets, doors, windows | Attic floor (highest thermal impact) |
| Recommended sequence | First | Second (after sealing) |
| Measurable metric | ACH (air changes per hour) | R-value (thermal resistance) |
Air sealing is the more accessible of the two upgrades, both in cost and DIY scope. Weatherstripping around doors and windows, caulking around window frames and baseboards, and foam gaskets behind outlet covers are all tasks most homeowners can complete in a weekend with materials costing $20-$100. Attic air sealing - targeting the top plates where walls meet the attic floor - is more involved and often benefits from professional help, particularly in homes with complex framing or mechanical penetrations.
Insulation costs vary significantly by type and location. Adding blown-in insulation to an attic is one of the more cost-effective professional upgrades available, with the U.S. Department of Energy noting that proper attic insulation can reduce heating and cooling costs for many homes. Wall insulation retrofits are more labor-intensive because they typically require drilling into exterior or interior surfaces to inject or blow material in.
25-40%
Share of heating/cooling loss from air leaks
According to the U.S. Department of Energy, air infiltration accounts for roughly 25-40% of heating and cooling energy loss in a typical home.
15%
Potential savings from sealing and insulating
The EPA's ENERGY STAR program has estimated that sealing and insulating can save around 15% on total household energy costs, though results vary by home.
$200-$600
Typical annual energy cost of air leaks
The U.S. Department of Energy estimates that drafts and air leaks in an average home can waste the equivalent of $200-$600 per year in energy costs.
Before committing to either upgrade, a home energy audit - offered by many utility companies at low or no cost - uses blower door testing to quantify air leakage and identify priority areas. This is money well spent. If you're new to the process, Getting Started with Home Energy Efficiency walks through the core concepts and first steps.
For a look at how attic insulation interacts with roof ventilation - a nuance that trips up many homeowners - see Roof Ventilation and Attic Insulation: Weighing the Trade-offs.
Making the Right Call for Your Home
Most homes benefit from both upgrades eventually, but sequencing and prioritization matter. A useful mental model: air sealing is the bucket; insulation is what keeps the water warm. Fix the leaks first.
If you're working with a limited budget, start with the lowest-cost air sealing tasks - door and window weatherstripping, caulking visible gaps, and outlet gaskets. These require no permits, no contractors, and no specialized tools. Even modest sealing in an older home can produce noticeable comfort improvements.
If your home already feels reasonably draft-free but struggles with temperature swings, focus on insulation - particularly the attic, which is where the largest thermal losses typically occur in both summer and winter. Note that certain insulation work, particularly in crawl spaces or when combined with vapor barriers, may require a permit or licensed contractor depending on your local building code. Always verify local requirements before starting work.
Many utility companies and state energy offices offer rebates for both air sealing and insulation work performed by certified contractors. Check with your utility provider and the Database of State Incentives for Renewables and Efficiency (DSIRE) to understand what may be available in your area - these programs change, so verify current terms directly.
For quick, low-investment steps that complement these upgrades, Low-Cost Ways to Improve Your Home's Energy Efficiency covers affordable actions that take an hour or less. And for room-by-room guidance on where energy actually goes, Energy-Efficient Practices for Every Room in the House offers practical, space-specific advice.
This article is for general informational purposes only. Costs, savings, and applicable codes vary by location and home condition. Consult a licensed energy auditor or contractor for guidance specific to your home.
The content provided on our blog site traverses numerous categories, offering readers valuable and practical information. Readers can use the editorial team’s research and data to gain more insights into their topics of interest. However, they are requested not to treat the articles as conclusive. The website team cannot be held responsible for differences in data or inaccuracies found across other platforms. Please also note that the site might also miss out on various schemes and offers available that the readers may find more beneficial than the ones we cover.